

If you are also reduced to this, these beat-the-heat tutorials can cool you off. © Instant Vantage CC-by-SA-2.0
As the heatwave drags on, let’s take action! To keep cool without going broke, follow our guide to the best DIY tutorials to beat the heat.
From DIY air-conditioning to the 100€ swimming pool, makers are brimming with creativity when it comes to beating the heat. The heatwave may be set to stay, but take heart, dear readers. As every summer, Makery offers several DIY solutions to simmer down and cool off.


This DIY air-conditioner that can be built in less than 15 minutes is one of our favorite tutorials (and yours too…):
Materials
To make your own air-conditioner, you’ll need:
– an old cooler. Or a new one. Otherwise, a Styrofoam box will also do the trick;
– a curved PVC pipe;
– a drill;
– a saw;
– a fan (yes, the kind that blows hot air, for now);
– bottles of ice water (or any other kind of ice);
– angel hair, crepe paper or anything else that waves for effects;
– Scotch tape.
Assembly
1. Place the fan on the cover of the cooler and trace the circle. Do the same with the PVC pipe(s)—the more pipes, the more power.
2. Saw out the circles.
3. Place the fan pointing down and the pipe in the sawed-out holes. You can also set them in place with hot glue if necessary.
4. Scotch tape the paper to the tube.
5. Put ice in the cooler.
6. Plug in. Chill.
Demo of DIY air-conditioner by Desertsun02:

Want to stay cool whevever you go? It’s the same concept with the portable air-conditioner. Simply replace the fan with a battery-operated mini version, the cooler with a PVC pipe and two caps, and the original PVC pipe with plastic tubing to let the air out. You can even make the tube long enough to coil around your neck. Don’t just keep cool, look cool too.
How to make your own portable air-conditioner by Izzy Swan:
Refrigerating bucket

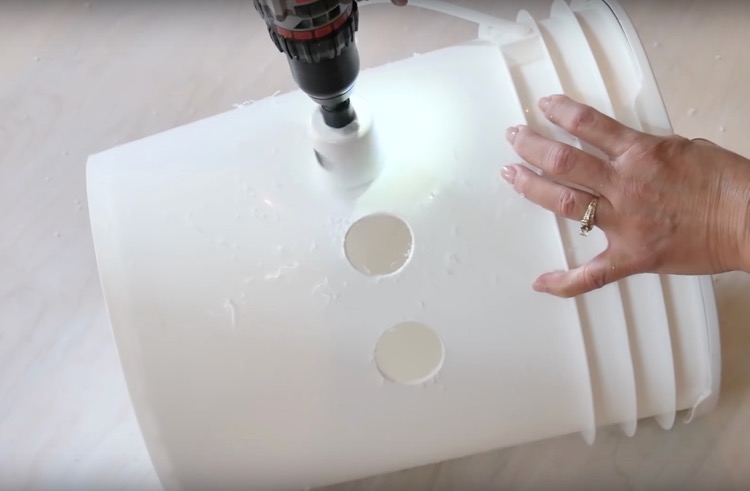
This is a variation of the cooler-air-conditioner, but simpler: we use a plastic paint bucket with a lid. Even better, the system is portable using the bucket handle. Cost: approx. €50.
Materials
– a 20 liter or more plastic paint bucket with a lid;
– a fan;
– a PVC tube;
– an expanded polystyrene roll;
– a hole saw.
Assembly
1. Cut the lid of a 20 liter or more plastic paint bucket to the size of a fan placed vertically on top of it (keeping the removable lid).
2. Line the inside of the bucket with expanded polystyrene, then with cooling bags (from frozen food shops).
3. Cut the PVC tube into 3 sections.
4. Make 3 holes with the same diameter as the PVC tube on the side of the bucket with a hole saw.
5. Insert the tubes.
6. Place a can of 3 to 5 liters of frozen water in the middle and put the fan back on top.
Tutorial by eHow:
The €0 eco-cooler

The eco-cooler is a system invented by a man in Bangladesh who was inspired by the cool air expired through pursed lips. Air entering the house is refreshed by passing through plastic funnels lined up on a board placed on the window. Engineers say it’s a sham, but everyone loves this zero energy and 100% reuse project that could lower a room’s temperature by 5°C.
Materials
– plastic water bottles;
– a wooden board;
– a hole saw.
Assembly
1. Cut a wooden board the size of the window.
2. Cut the plastic water bottles in half and keep the top parts.
3. Use one bottle to mark the spaces on the board to align the funnels edge to edge, horizontally and vertically.
4. Pierce holes the size of the bottle necks with a hole saw. Cut out the appropriate number of bottles and insert them into the board.
5. Fix the board with the bottle tops to the window, funnels facing outward.
6. If you reuse an old board, this will cost you almost nothing.
The eco-cooler inventor explains his method:
Plumber’s fan hack

Give your fan a makeover by winding copper cables around its outer cage. They are usually supplied with water from a cooler. The result is a significant decrease in temperature for the air coming out of the fan for nearly three hours. The water is in a closed circuit, so you just need to refresh the ice. It may require a bit more materials, but it’s cheaper than buying a commerical air-conditioning unit. Cost: approx. €30 (without the fan).
Materials
– a copper refrigeration tube;
– a fan;
– flexible plastic tubes;
– a water pump for aquariums;
– a flexible cooler.
Assembly
1. Wind and fix a copper refrigeration tube on the outside of the fan cage.
2. Pull the ends out through the back of the fan.
3. Connect them to two sections of flexible plastic tubes.
4. Connect one end of each tube to an aquarium water pump.
5. Fill a flexible cooler with ice and some water at the bottom.
6. Immerse the pump and the other plastic tube in the water.
7. Turn on the pump.
8. Switch on the fan.
Tutorial by Fixitsamo:

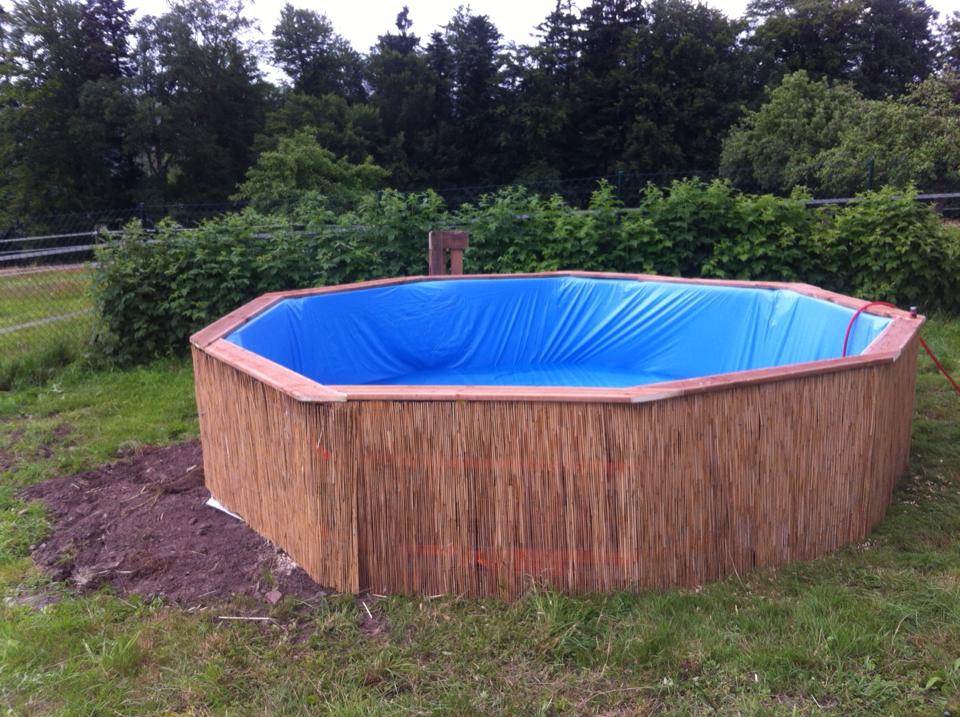
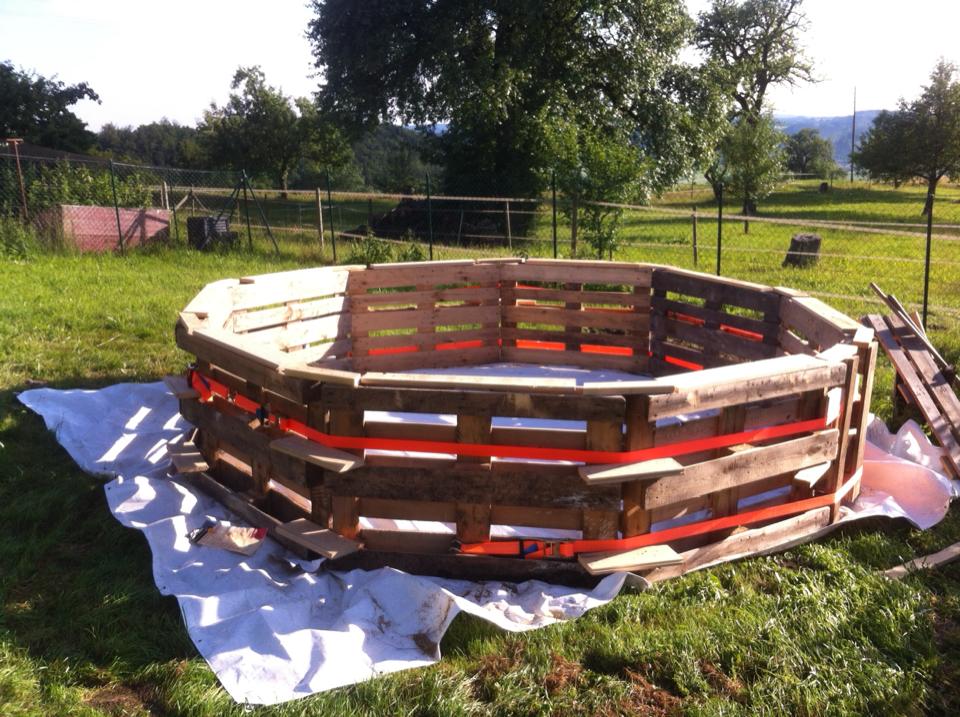
For fans of urban upcycling and DIY garden furniture, this swimming pool made from recycled pallets can be built over a weekend with minimal materials for less than €100.
Materials
– 9 pallets;
– 3 big tarps;
– straps;
– wide waterproof duct tape;
– a dozen old bath towels;
– bamboo planks;
– roll of fine bamboo wattle;
– hammer and nails.
Assembly
1. Arrange the pallets in a circle on a big tarp.
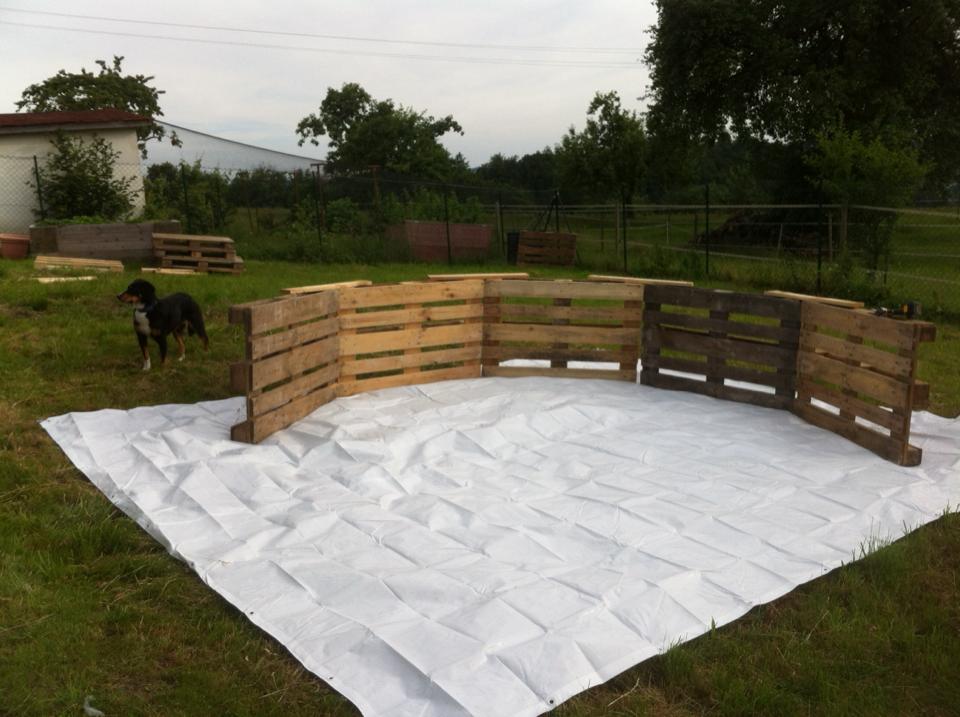
2. Secure the pallets with straps.
3. Use a second tarp to line the inside and drape bath towels over the cracks to round out the inner edges.
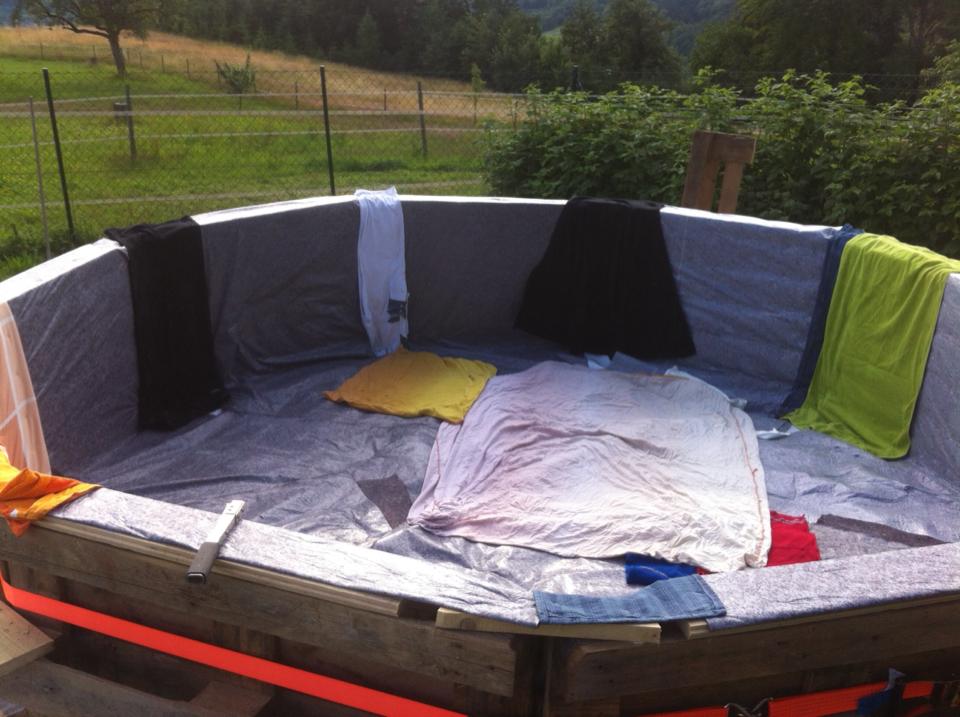
4. Lay the bamboo planks around the outside to make a rim, line the inside with the third tarp and secure with tape.
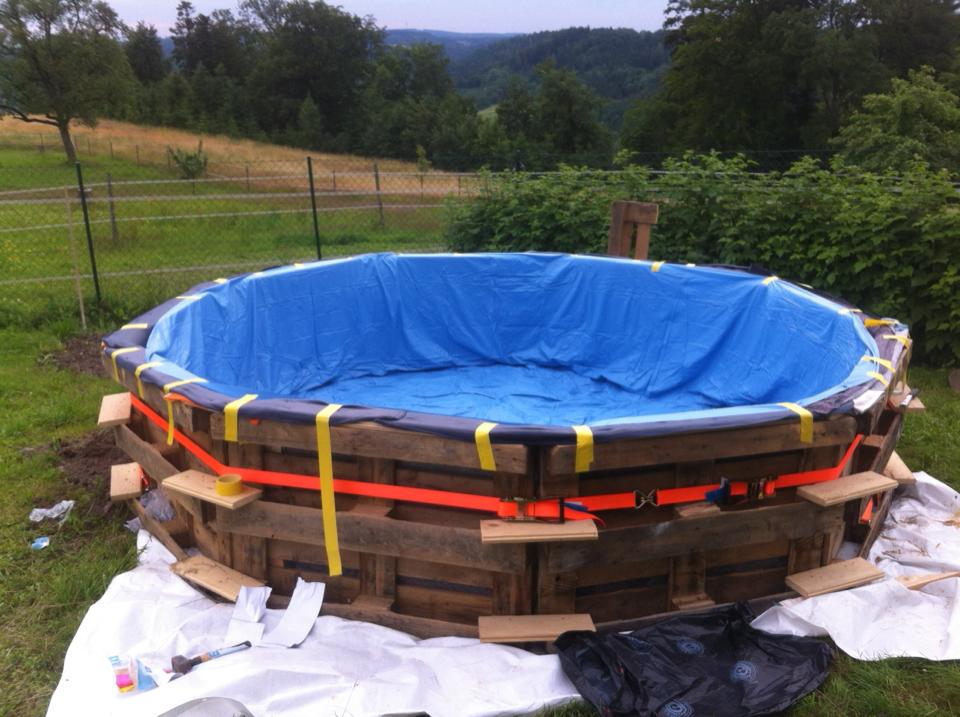
5. Decorate with bamboo wattle, fill with water and dive in!
If you also have a DIY solution to share, the comment box is yours!