
Thermoformed Yoda head. © Onl'fait
Until now, thermoforming machines only equipped the industry. The brand new Swiss fablab Onl’fait proposes a simple tutorial to make molds and more molds.
A thermoforming machine enables you to make molds by placing a sheet of heated plastic on an object and vacuuming the air in between. Vacuuming cools down the plastic that hence doesn’t stick. The molds you obtain are not only faithful, they also allow you to use different materials, particularly edible! The idea of making molds of anything and everything is tempting. To such an extent that an office thermoforming machine, the FormBox, proposed in May 2016 on Kickstarter brought in $588,775 on the $50,000 requested.
The FormBox in action:

The FormBox will be commercialized in March 2018 around €400… Still a little expensive for the budding maker? This was without counting on the Onl’fait fablab that officially opens on October 11 in Geneva, and as a preview, is rewarding the subscribers of its YouTube channel with a crafty tutorial to make a low-tech thermoforming machine. Makery approached the Swiss to offer you the step-by-step version of their tutorial.
The DIY thermoforming machine from the Onl’fait fablab presented by Sébastien Mischler (in French):

The tutorial of the DIY thermoforming machine in four steps
Equipment
– A rectangular wooden box;
– A wooden frame;
– A small oven;
– A vacuum cleaner;
– 0.3mm PETG plastic sheets (also exists in rolls);
– Paper clips.
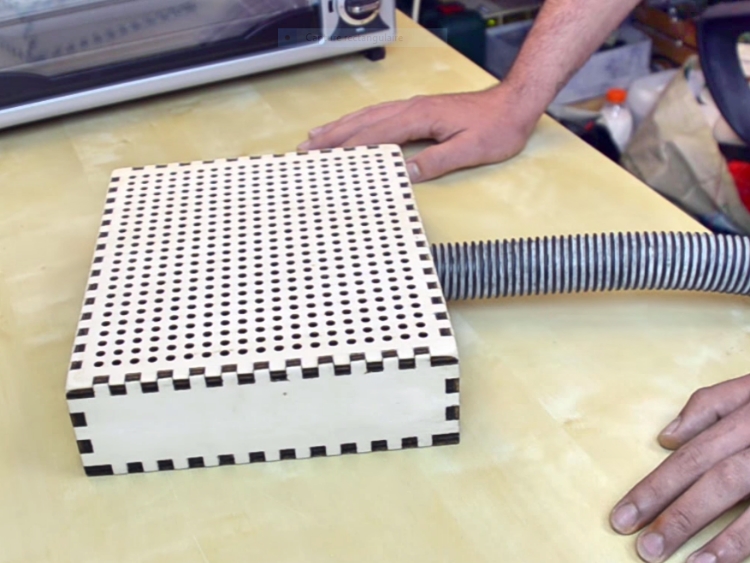
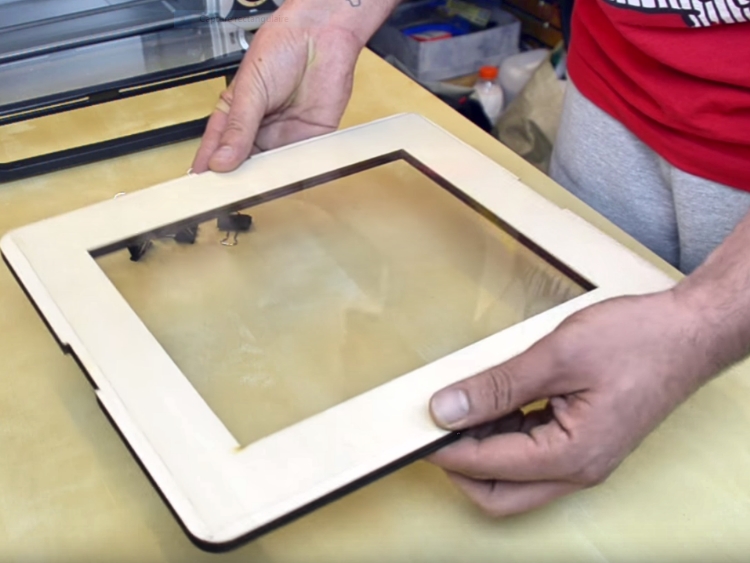
Step 1: production of the vacuum table and the frame
The vacuum table is used to place the objects you want to mold. In this case, it is a simple rectangular wooden box (approx. 40 x 30 cm for a height of 8 cm). To make yourself or have cut for you. One of the sides has a hole to insert the opening of a vacuum cleaner hose. The top surface must be pierced with small holes at regular intervals.


Another piece of wood, the frame, is used to heat the plastic sheet in the oven. The dimensions of the frame, which will be placed on the grooves designed to support the cooking racks, are determined by those of the mini-oven. Make sure you have an approx. 5cm edge so that your hands can hold the frame without touching the empty surface.
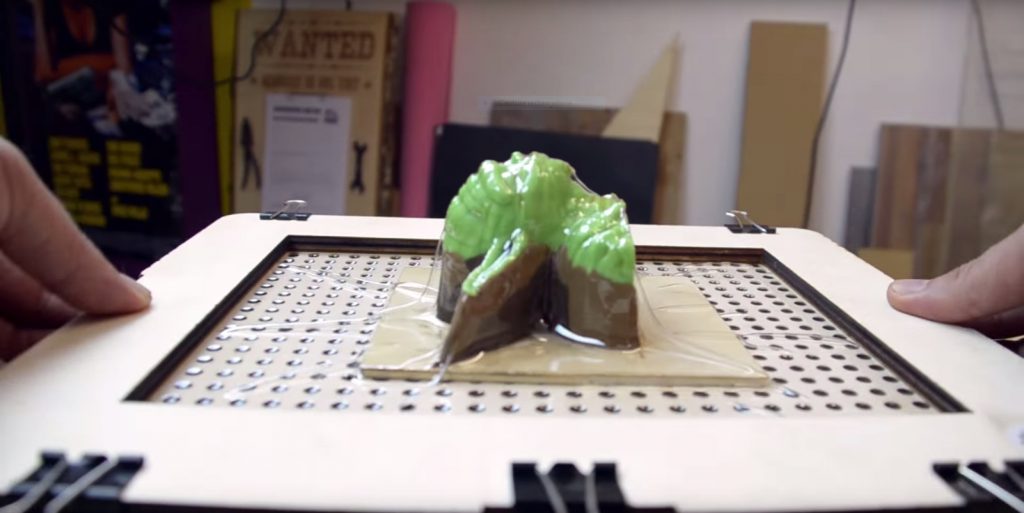
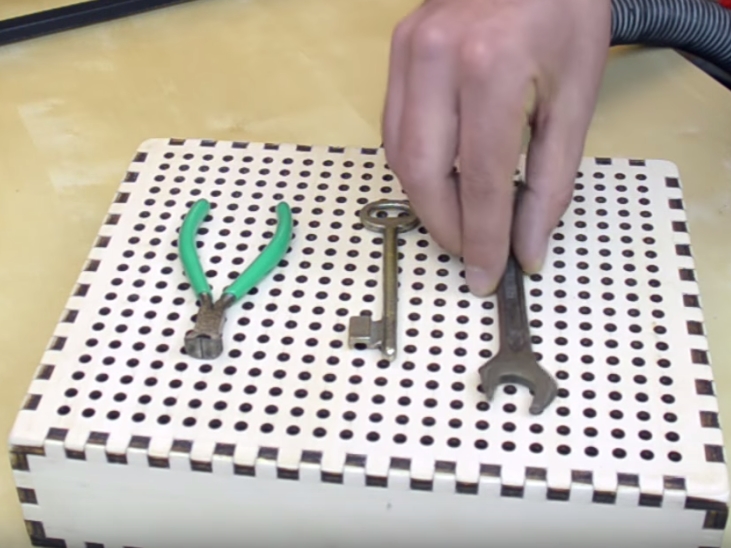
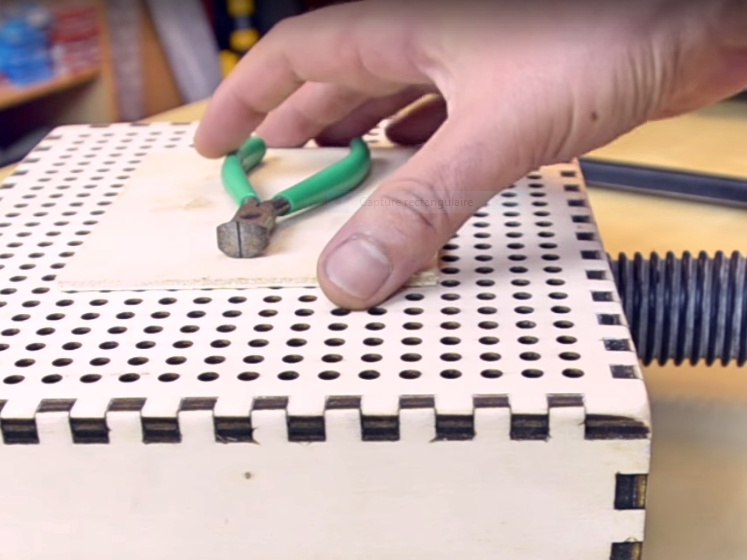
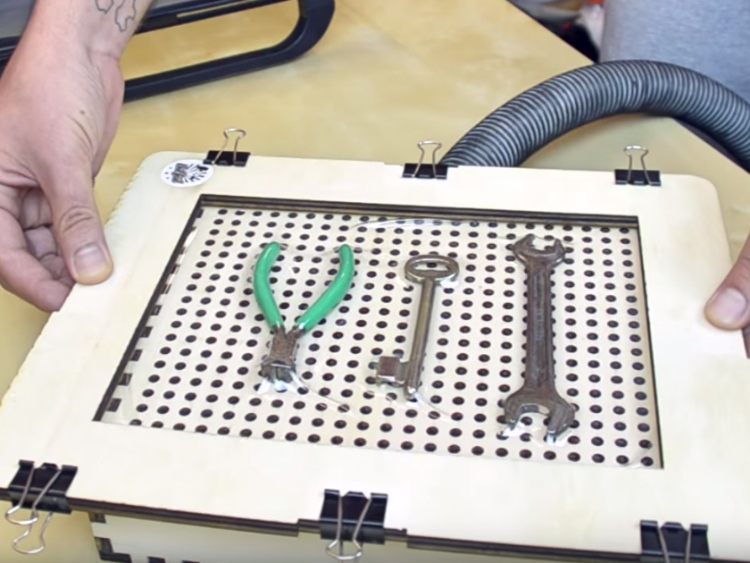
Step 2: placing the objects
Place the object(s) to mold on the vacuum table. In order to avoid the holes of the vacuum table printing a pattern on the mold, place a board under the object. If the object has important empty spaces underneath, the plastic may fold into them. Fill in these spaces with clay.


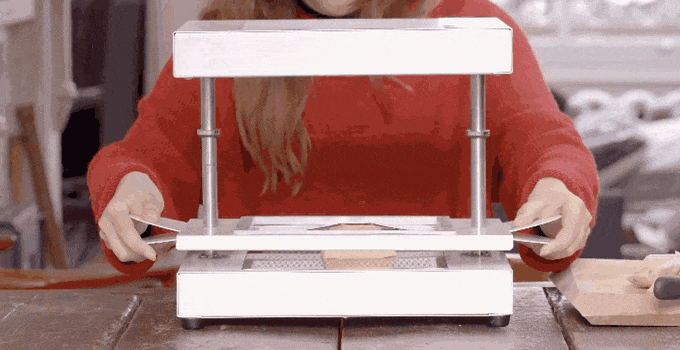
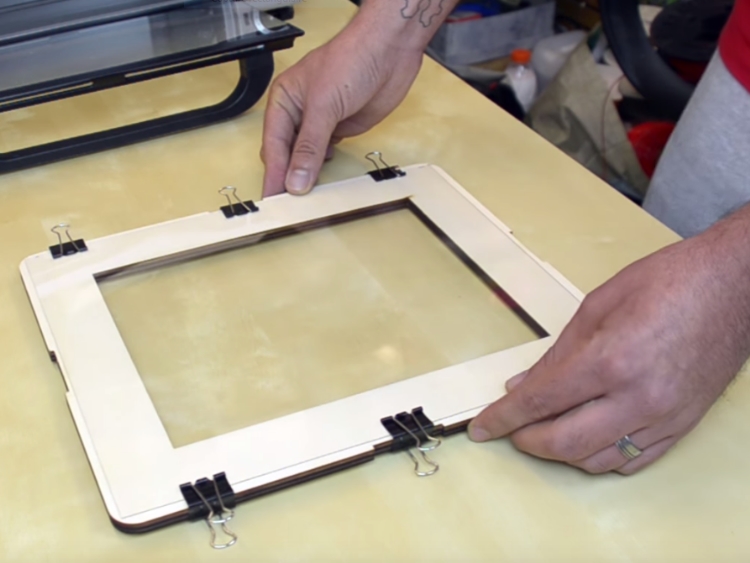
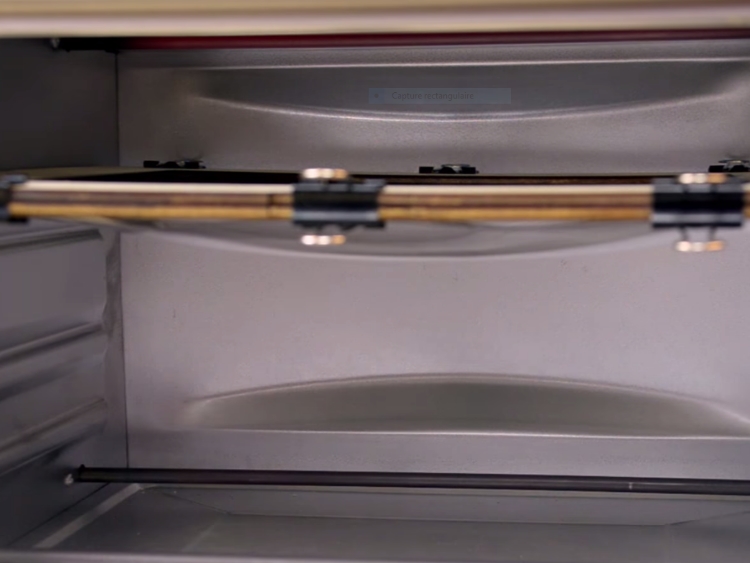
Step 3: heating the plastic sheet
Place the plastic sheet on the frame (do not forget to remove the potential protection films). Fix it with paper clips. Put the frame in the oven, sheet facing downwards. Heat at 180 degrees for two or three minutes. Keep a close eye on the operation: the plastic will become distorted and round inside the frame.
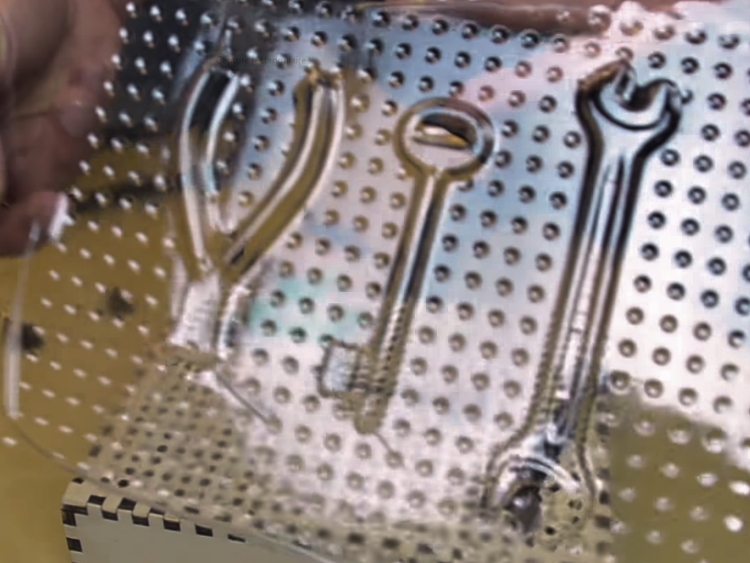
Step 4: molding the parts
Once the heating is over, switch on the vacuum cleaner. Remove the frame and turn it over. Cover the objects placed on the vacuum table: the thermoforming is carried out. Your mold is ready in a few seconds! All you need to do is extract the objects.
If you intend to make a lot of molds, Sébastien Mischler recommends you buy a vacuum pump instead of using the vacuum cleaner. And you can contribute to their crowdfunding campaign to support the opening of the fablab on October 11.
Other tutorials from the Onl’fait fablab