
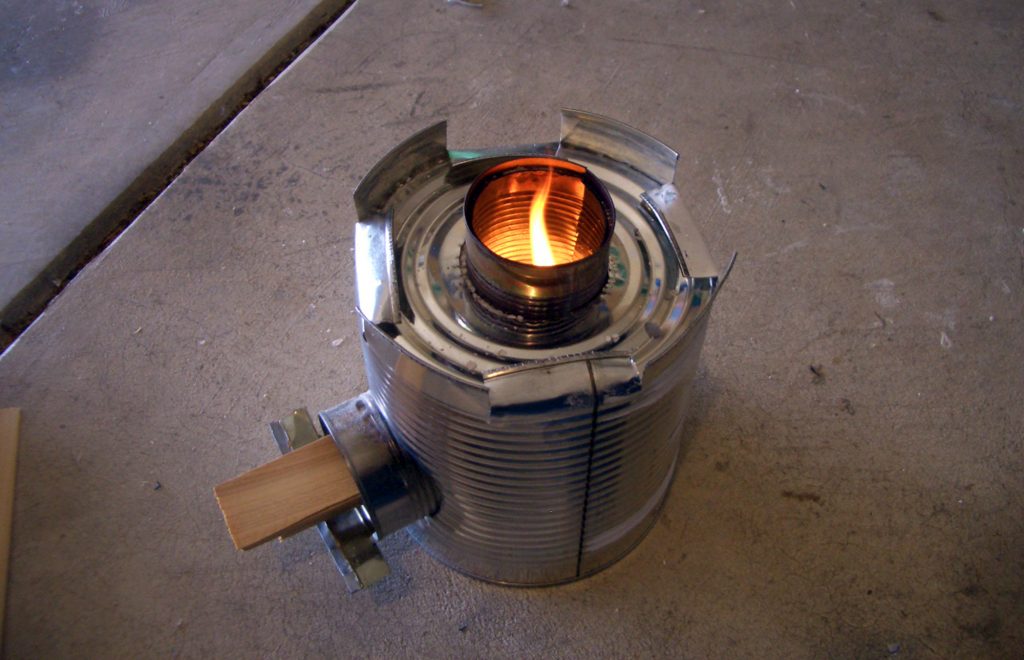
No smoke and just a small quantity of ashes with the rocket stove. © Darrinmcl CC-by-SA 2.5
We tested it for you at the Névez IndieCamp in Brittany. The rocket stove is an economical eco-wood-burner to cook or warm up, at home as well as camping. Tutorial.
At the Névez IndieCamp, a camp for makers in Brittany where the objective was to develop an almost 100% autonomous lifestyle, we improved our rocket stove, this formidably efficient and simple wood-burner that enables you to cook and heat water with very little wood (even green wood, twigs, dead leaves, etc.).
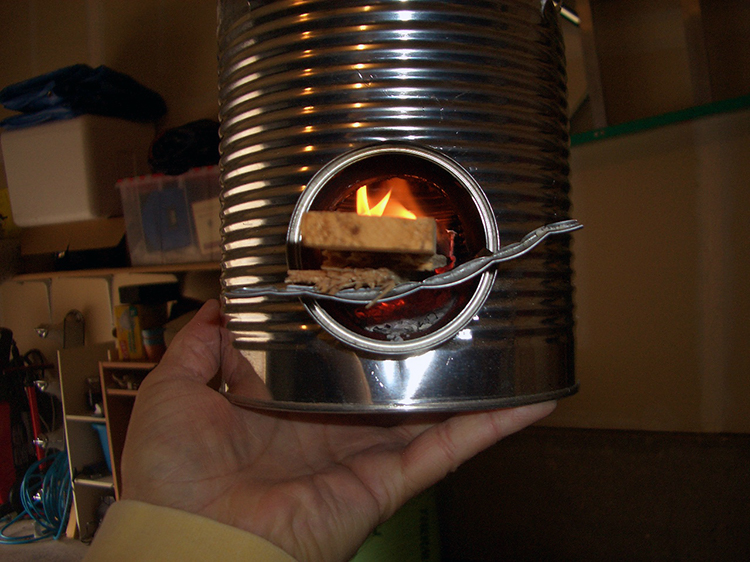
The rocket stove is thus named because of the sound it produces when functioning, similar to a rocket tailpipe. Its strong points? It’s ecological, economical and has an exceptional thermal performance (impossible to obtain with a traditional firebox). It consumes in fact very little wood to rapidly reach its nominal temperature (up to more than 1,000°C), does not generate any smoke or very little thanks to a so called complete combustion and stores the thermal energy its produces very well.
It can also supply an oven and proves to be the ideal addition to a solar oven. Here is how to make your own, in a cooking version, from the Darrinmcl tutorial on Instructables.
Equipment
– A No. 10 can and its lid (standard size in restaurants, just ask and you will most likely get it for free);
– Four “normal” cans;
– Insulation material (sand, earth, fiberglass, etc.);
– Tin snips;
– A hammer and a nail;
– A file;
– A marker pen;
– Gloves (beware you can cut yourself!).
Design
1) On the No. 10 can, trace the shape of a small can with a marker pen. With the hammer and nail, pierce several holes around the outline to serve as a guide when you use the tin snips to cut the circle out.

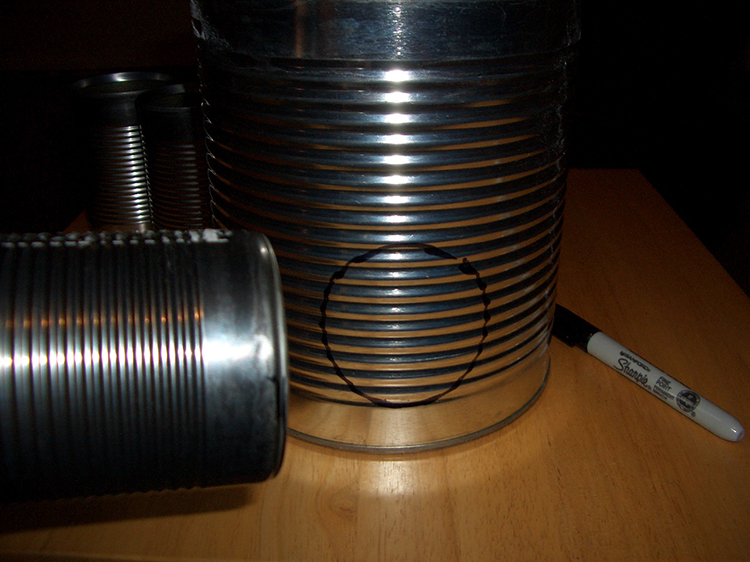
Piece of advice: cut out a circle a margin smaller than the outline so that you have a margin of error and obtain a tight interlocking. Once the tin is cut out, use the file to soften the cutting edges.
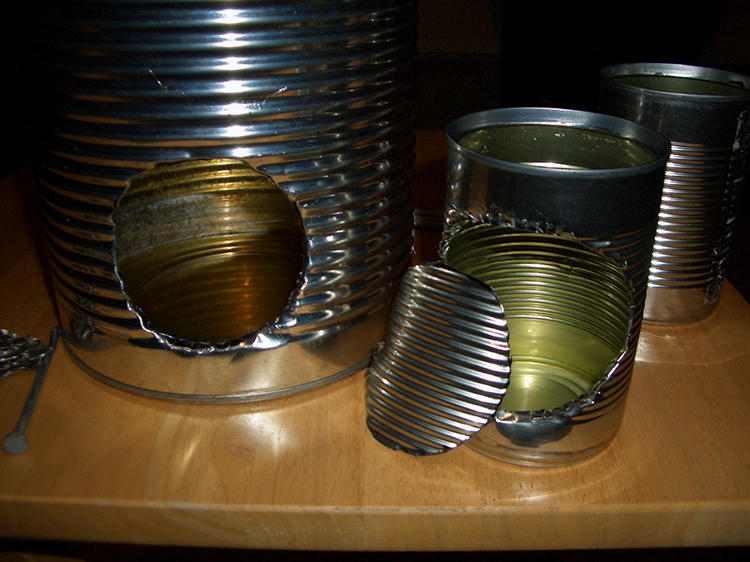
2) On another tin, cut out the bottom to turn it into a tube and fix it as shown on the picture below.
3) For the chimney, take another can and cut out the bottom. For it to interlock well with the “bend” can, slit it vertically from top to bottom about 5mm; all you need to do is slip it in the “bend” can and it will hold still.
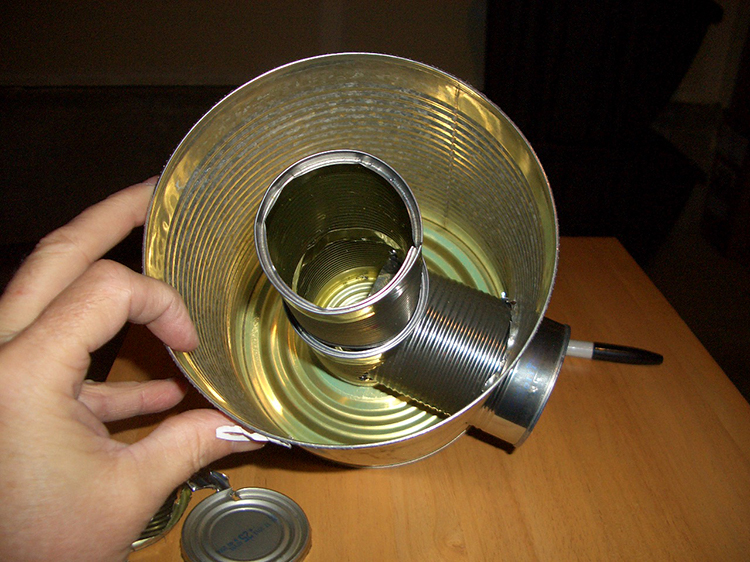
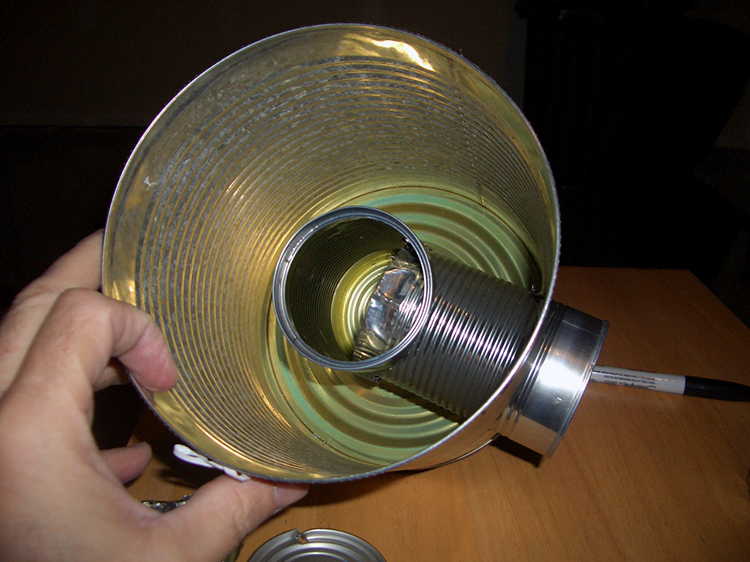
4) In the center of the lid of the large can, copy with the maker pen the diameter of the “chimney” can and cut out the hole. Il will be used as a lid, above the insulation material.
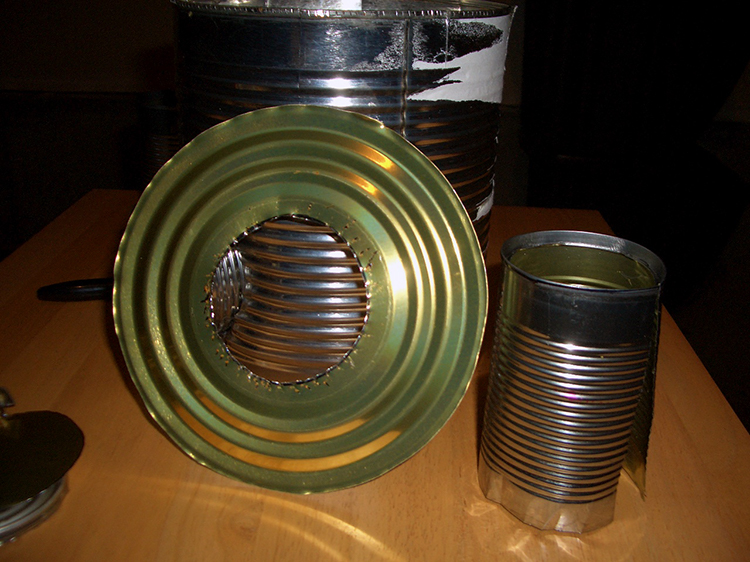
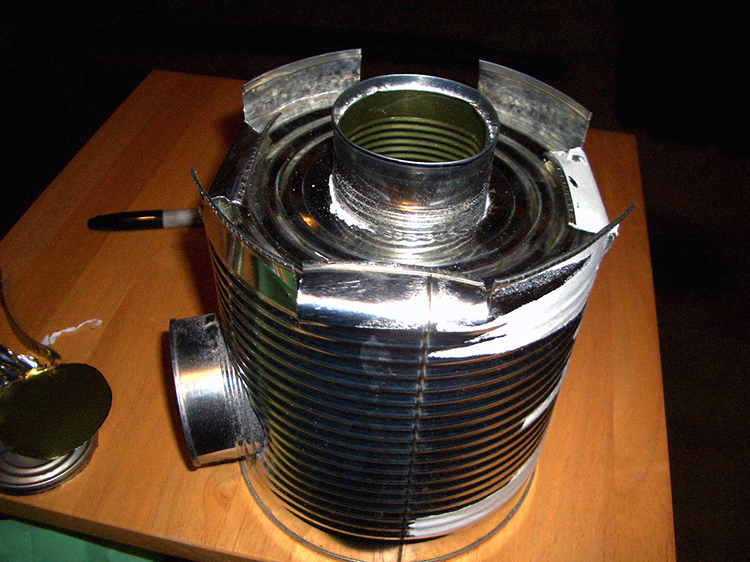
5) Finally, fill the large can with the chosen insulation material. It can be sand, clay, foam insulation, ashes, in short any material that has good insulating properties. Slowly fill the can, trying to compact the lot, up to 2cm from the top.
Then cut these remaining 2cm into eight strips as shown on the photo below, place the lid on the chimney and fold back four strips to secure the lid.
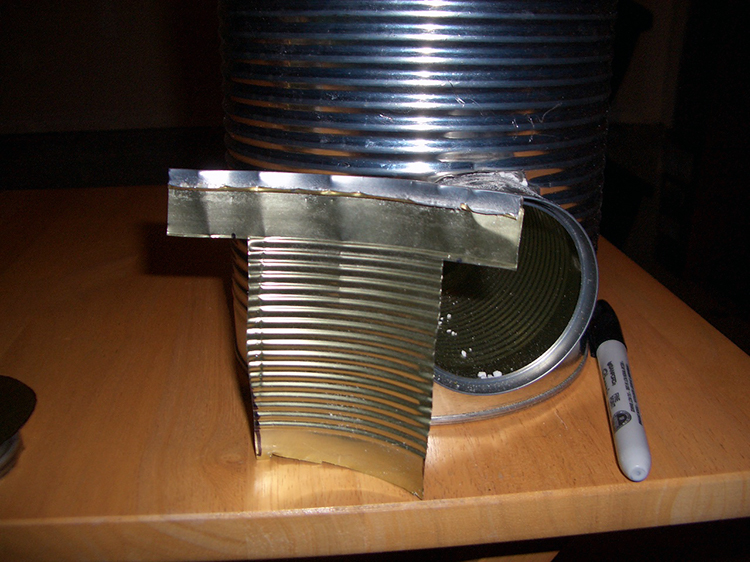
6) Last stage, and one of the most important: the air suction. Cut out the last can in the shape of a T. The stem of the T must be as wide as the diameter of the tube can. A picture is worth a thousand words, so see below:
There you are, your rocket stove is ready to function! A bit of newspaper, a few twigs and you’re all set to savor your favorite dishes while camping. The rocket stove can offer an incredible number of designs, like in this tutorial that only uses sand and a little water.
The Darrinmcl rocket stove tutorial on Instructables