
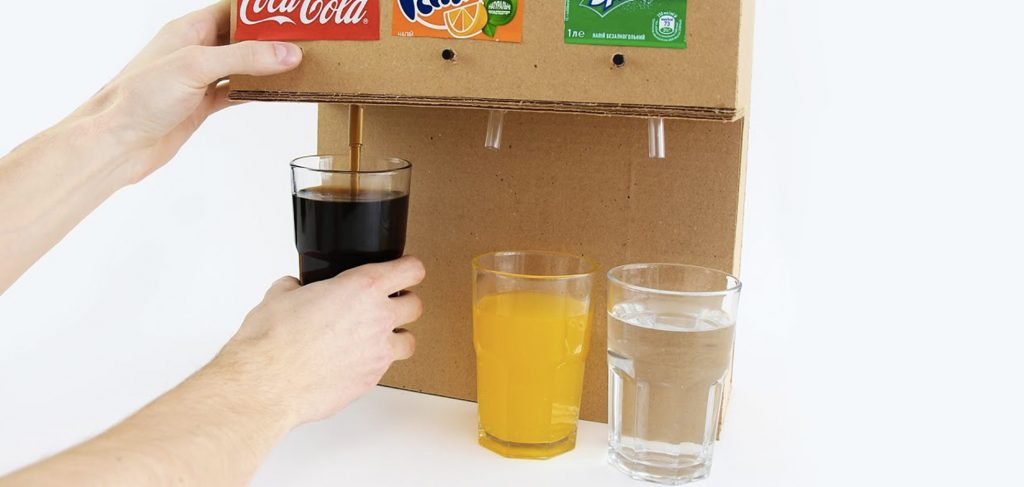
The cardboard fountain. © DR
Heat waves are back again. Before you become liquefied, quick, one last effort to make a soda fountain.
The weather is good, it’s hot. And you’ll be thirsty… To make this summer fun ahead of time, a bit of DIY is required. We unearthed for you a tutorial to create a fresh drink distributor-fountain to carry everywhere. Posted on the YouTube channel The Q Channel, it only costs thirty odd euros. Anastasia (from The Q) is authorizing us to give you details below. And our best friend cardboard is still here!
Equipment
– Quite thick cardboard and a cutter;
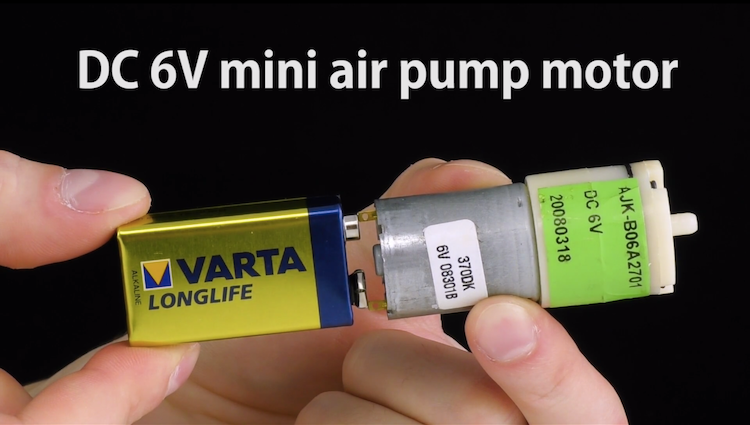
– A 9V battery and its connector;
– 3 6V mini-air pumps;
– Silicone tubes;
– 3 push-buttons and electric wire;
– A hot-melt glue gun;
– A pencil and a ruler;
– A soldering iron (optional).

Design
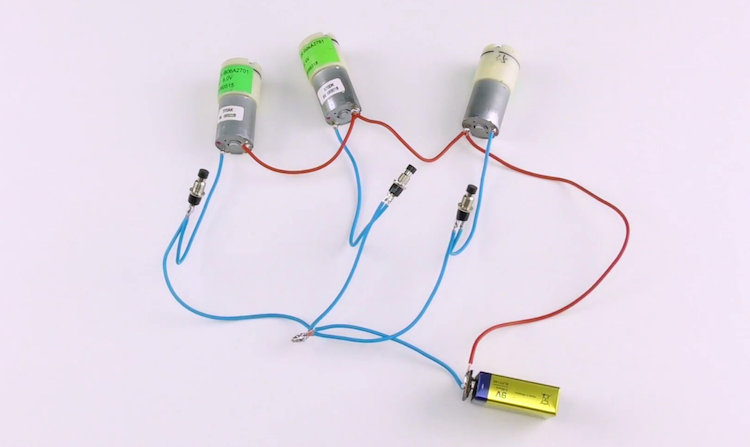
1) On each pump, solder a red wire on the positive terminal and a black wire (or blue as you prefer) on the negative terminal. Then solder the black wire of each pump on one of the two leads of the push-buttons (it doesn’t matter which lead, they don’t have negative or positive terminals). Solder the other leads among themselves, you then only have two wires, a black one and a red one. Solder them to the corresponding terminals of the battery connector.

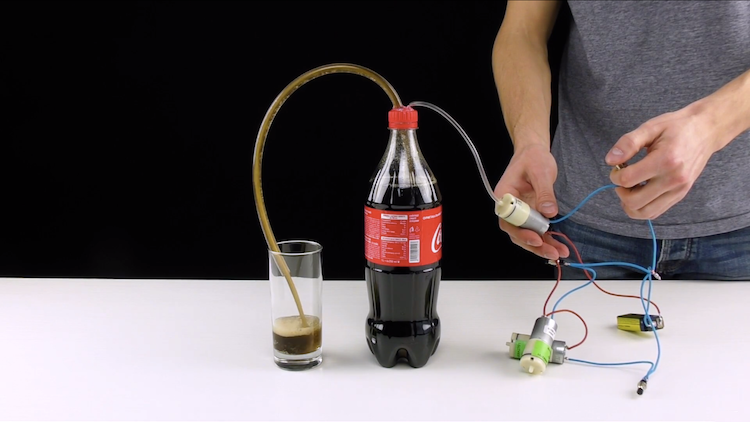
2) Remove the tops of your soda bottles and drill two holes corresponding to the width of the the silicone tubes. Then pass a tube through one of the holes so that it touches the bottom of the bottle; you will help yourself to soda through this tube. Through the other hole, slip 1 to 2cm of tube; this tube will be linked to the pump. Add hot glue around the tubes near the holes to make the system watertight.

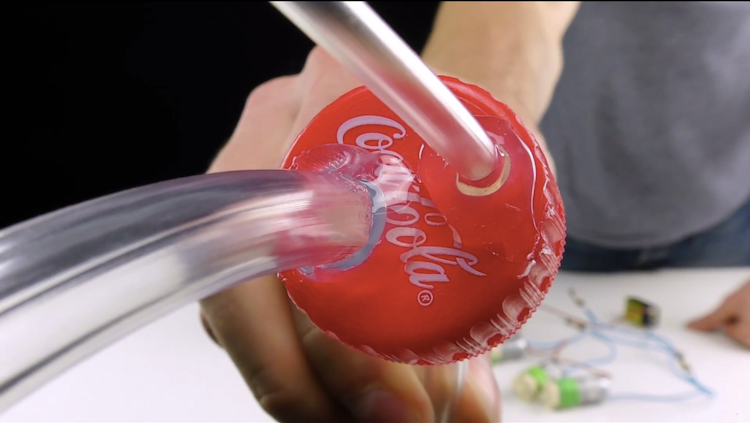
3) Screw the top tightly on the bottle, connect the tube to the pump and hold the other one above a glass. Test the pump by pressing the button.

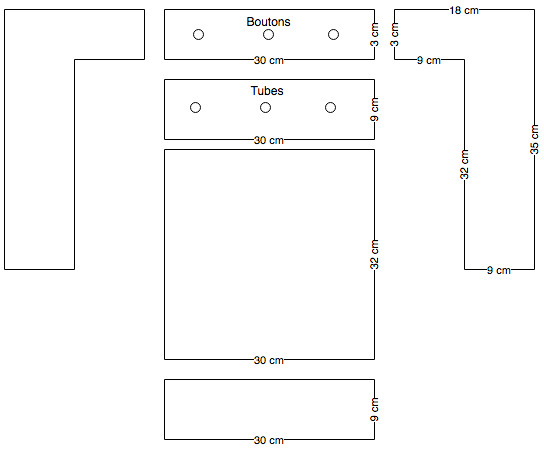
4) Cut out the cardboard according to the diagram below, and glue the different parts together following the numbering. Drill three holes for the buttons (the holes are indicated by the circles) and three holes for the distributor tubes.

Put your favorite drinks in the box, connect the pumps and your drink fountain is functional for your barbecue or your evening with friends! You can also make the box waterproof with plastic and gaffer tape for your bottles to always remain fresh in ice cubes.
