
At wire's end... © CC by 2.0 Gavin Schaefer
If Apple is “brave”, makers are smart. While the corporation just announced the demise of the jack on its new iPhone and new wireless earpieces, Makery shows you how to transform wired headphones into bluetooth headphones for $20.
On September 7, Apple presented the new iPhone 7. And the rumors were true: the new toy (ranging from $649 to $849) does not have a jack, which allows you to connect headphones and speakers. Don’t panic—Apple thought of everything, beginning with its Airpods, wireless headphones for $159.
Some applaud the disappearance of an output destined to become obsolete. The jack’s 3.5mm size hinders ultrathinness and deteriorates sound quality. Others point out that, if Apple claims to be “brave”, it’s also quite profitable—in addition to coming out with a new line of wireless headphones, in May 2014 the company acquired Beats, which sells bluetooth headphones. Biohackers see Airpods as the first implants made in Apple, while Photoshop buffs see an implicit reference to Titanic… In short, Apple newest initiative has triggered just as much passion as the Brangelina divorce (really, you don’t care?).
.@Apple So there's room for jack but ur not gonna put it on there. Second time this has happened. #AppleEvent pic.twitter.com/5tIEWQpjJZ
— nascarcasm (@nascarcasm) September 7, 2016
Meanwhile, the makers didn’t wait for the branded apple to step into the future. In an ultra-complete tutorial viewed more than 165,000 times, Instructables user Silentbogo explains how to transform old school headphones into a bluetooth device. If the list of necessary materials may make your head spin, Silentbogo covers the entire process from A to Z, including the printed circuit board. Big bonus: it costs $20. Tremble, Apple…
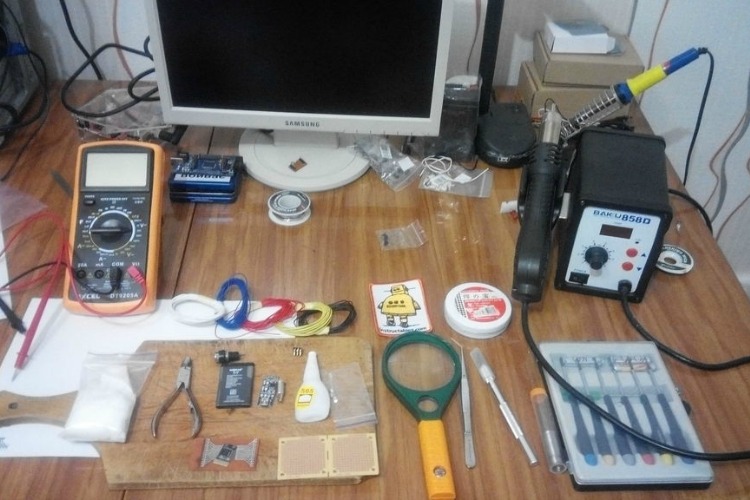
Materials
– Headphones;
– Laser printer, glossy paper and iron (for the PCB)
– Prototyping board;
– Cell phone battery, any kind (around $3);
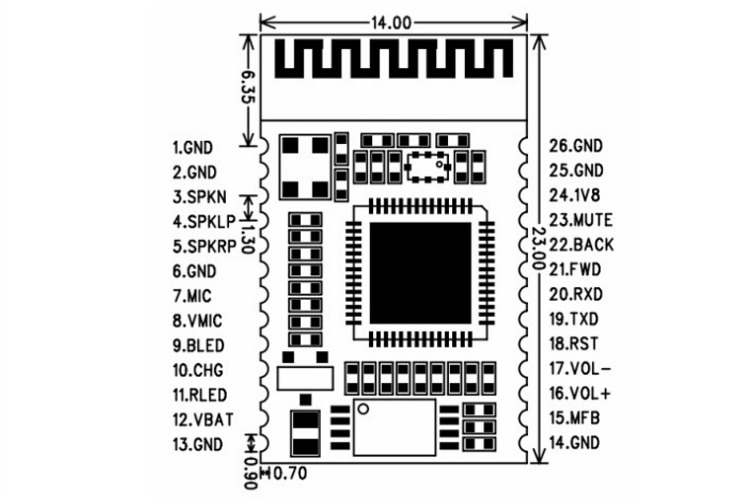
– BLK-MD-SPK-B Bluetooth module;
– Lithium-ion battery charger;
– 2 mini-jacks (male and female);
– Switch;
– 3 push buttons;
– 1mm wire;
– Piece of prototyping board;
– Soldering flux (to make soldering easier, you can make it yourself), solder wire and wick;
– Electrical tape;
– Hot glue;
– Iron (III) chloride or sodium persulfate
– Acetone or acetone-based nail polish remover
Tools
– Philips screwdriver (PH0 or PH00) and small flat head screwdriver;
– Soldering iron;
– Multimeter (just in case);
– Scissors, tweezers, wire cutters
– Rotary tool with cutting and grinding bits + a small drill bit for PCB holes;
– mini-USB cable;
– Cell phone charger.

Fabrication
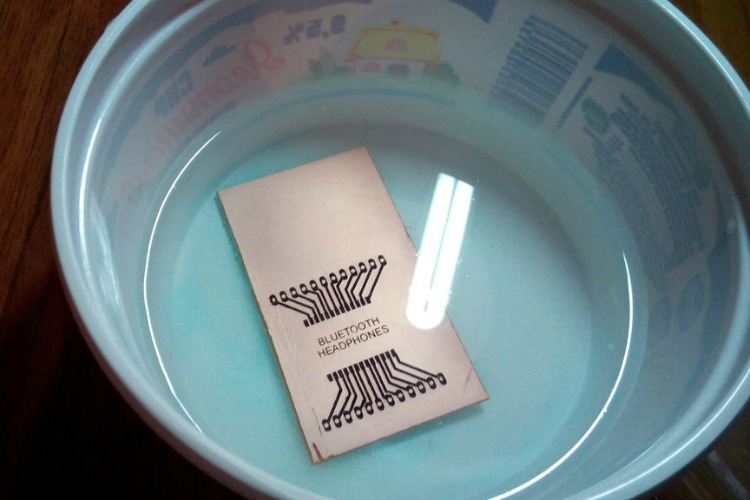
1/ PCB
Print Silentbogo’s PCB layout on the glossy paper and attach it to the PCB. Iron the board for a few minutes in moderate heat in order to transfer the print (to avoid leaving residue, he recommends placing a sheet between the board an the iron). Let cool and place the board in a bath of lukewarm water. Pull off the glossy paper.
You can then begin the etching process using the sodium persulfate or another product of your choice. Dissolve 50g of persulfate in 250ml of lukewarm water and submerge the PCB inside it. Let cook until the process is complete (about 20 minutes). Once the etching is done, remove the toner with acetone.
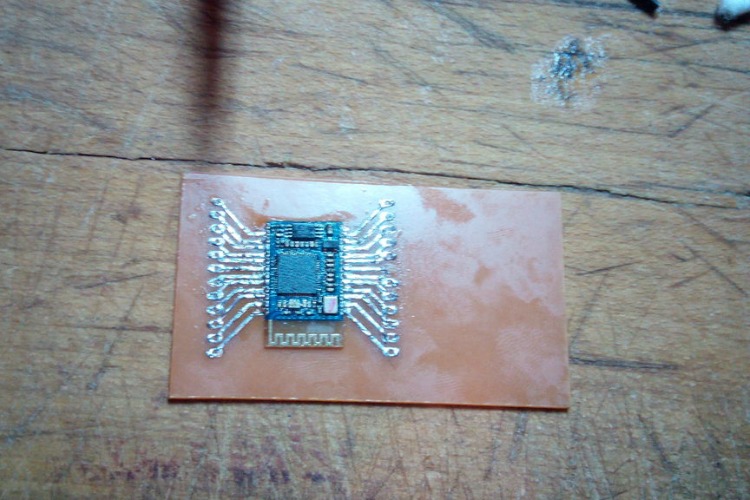
Cover the surface of the PCB with soldering flux and cover the copper tracks with solder. The soldering wicks can help to spread it evenly.
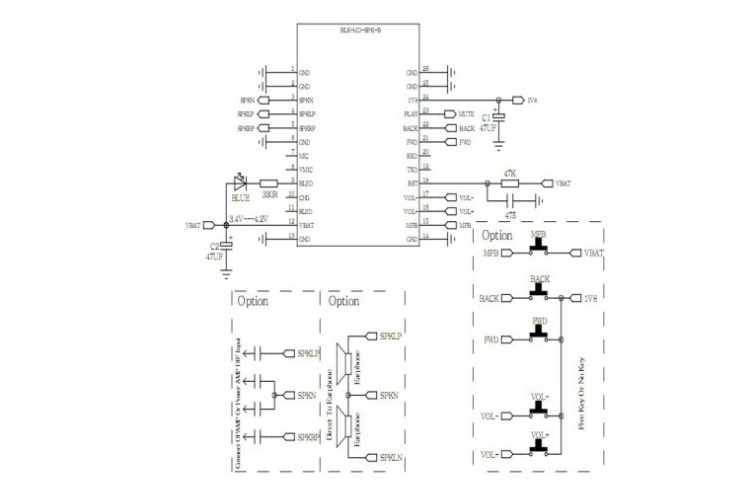
Solder the bluetooth module.
2/ Install the volume buttons
To connect the volume buttons, Silentbogo refers to the bluetooth module diagram on ElecFreaks. He chooses 3 buttons: Vol +, Vol – and multifunctional (Play/Pause/Mute).
Connect the 3 volume buttons to the piece of prototyping board’s 1.8V source (pin 24) and the multifunctional button to VBAT (pin 12).
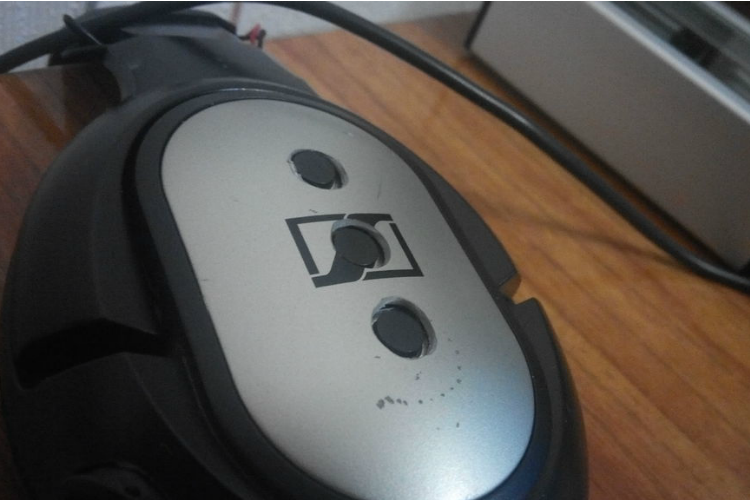
Drill 3 holes in the headset to place the buttons. Intall and glue the prototyping board inside the earpiece cover.
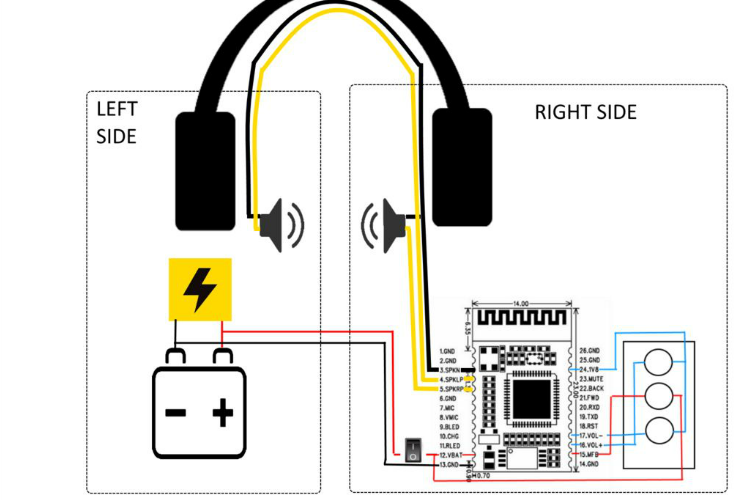
3/ Install the battery and assemble
In order to distribute the weight more evenly on both sides, place the battery and the charger in the opposite earpiece. Connect the left and right earpieces according to the provided diagram.
Test.
Silentbogo tries out his new headset:

If you have a problem with some of the steps, the discussion following the tutorial is quite active. People are currently trying to add a microphone. Go see for yourself!
Instructables’page for DIY bluetooth headphones