

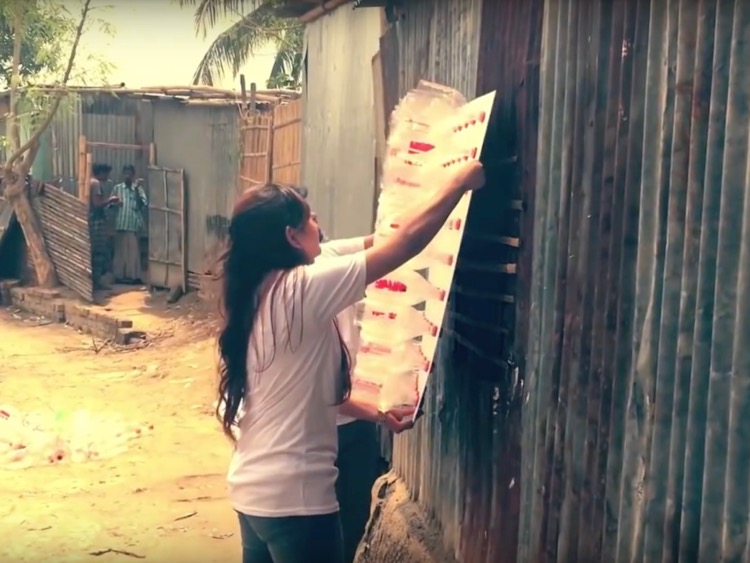
The eco-cooler from Bangladesh is the easiest solution to cool down the air. © DR
It’s summer, it’s hot, it’s time to find solutions to get some fresh air! Air-conditioning units are too expensive, and ventilation fan isn’t enough. Here are three DIY refreshing solutions coming from countries where heat is very common.
You think the worst is over? We invite you to consult the weather forecast for August. If need be, make the most of these few days of respite to produce one of these three economical solutions, hot country specials, sorted by order of difficulty.
Never again…


So easy: the eco-cooler
The eco-cooler is a system invented by a Bangladeshi who was inspired by the fresh air expired when you purse you lips. The air that enters the house is refreshed by passing through plastic funnels aligned on a board placed on the window. Engineers say it’s a sham but everyone loves this zero energy and 100% salvage project that could lower a room temperature by 5°C.

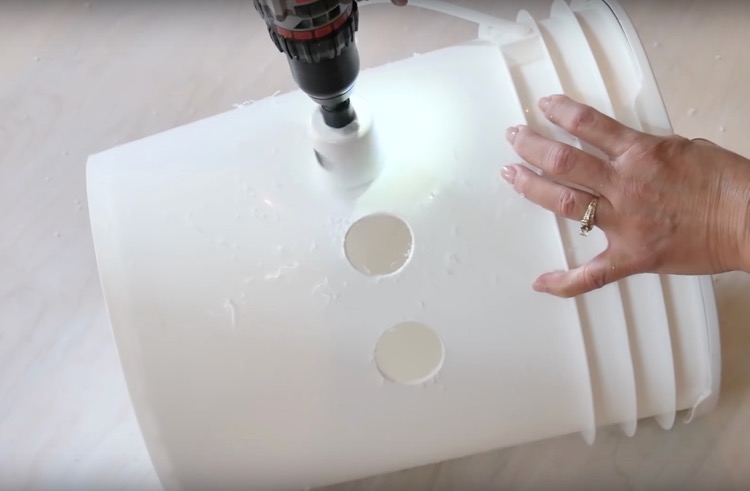
Equipment and design. Cut a wooden board the size of the window. Cut a plastic water bottle in two and keep the neck part with the top. With the bottle, mark the spaces on the board for an edge to edge alignment of the funnels, horizontally and vertically. Pierce holes the size of the bottle necks with a hole saw. Cut out the necessary number of bottles and insert them in the board. Fix the bottles with the tops and the board to the window, funnels facing outside. It is almost costless if the board is salvaged.
Tutorial:

Easy: the refrigerant bucket
This is a variation of the cooler-air-conditioner we were telling you about last year–and that is still valid! Except that here it is even more simple: we are using a plastic paint bucket with a lid. And what’s more, the system is portable thanks to the handle of the bucket.

Equipment and design. Cut the lid of a 20 liter or more plastic paint bucket to the size of a fan placed vertically to stick on it (keeping the removable lid). Line the inside of the bucket with expanded polystyrene, and then with the material of cool bags (frozen food shops). Cut a PVC tube into 3 sections. Make three holes with the diameter of the PVC tube on the side of the bucket with a hole saw. Insert the tubes. Place a can of 3 to 5 liters of frozen water in the middle and put the fan back on it. Cost: approx. €50 with the table fan, without a stand.
Tutorial:
Moderately difficult: the plumber’s fan
Give your fan a new look by winding copper cables on the outside of the screen. They will be supplied with water from a cooler. Result: a significant decrease in temperature for the air coming out of the fan for nearly three hours. The water is in a closed circuit. All you need to do is renew the ice. It requires a little bit of equipment but it’s cheaper than an air-conditioning unit.

Equipment and design. Wind and fix a copper refrigeration tube on the outside of the fan screen. Take out the ends through the back of the fan. Link them up to two sections of flexible plastic tubes. Link up the end of one of the tubes to a water pump for aquariums. Fill a flexible cooler with ice and a bit of water at the bottom. Immerse the pump and the other plastic tube in the water. Turn on the pump. Switch on the fan. Cost: €30 approx. (without the fan).
Tutorial:
If you also have a DIY solution to share, the comment box is yours!